15 Things to Know Before Installing Low-Voltage Security Systems
15 Things to Know Before Installing Low-Voltage Security Systems
Ever wonder how to secure your home without breaking the bank or tearing down walls? Low-voltage security systems offer a powerful, yet manageable solution for homeowners and small business owners alike. But before you dive into the world of security cameras and motion sensors, there are a few crucial elements to consider.
This guide is designed to equip you with the essential knowledge for a successful installation, covering everything from safety precautions to selecting the right components. Understanding the fundamentals of low-voltage wiring will not only ensure a smooth project but also help you maintain and troubleshoot your system in the long run. Let's get started!
1. Understand the Basics of Low-Voltage Wiring
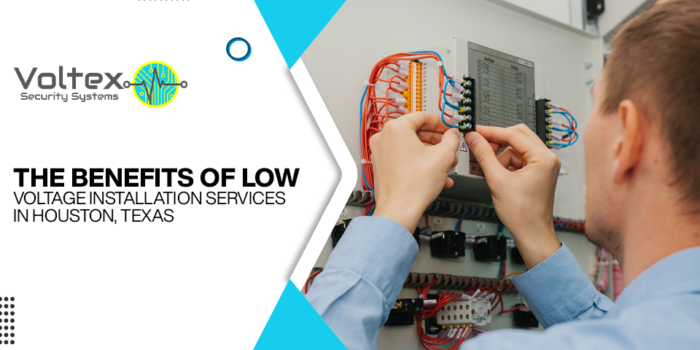
Low-voltage wiring, typically operating at 50 volts or less, is the backbone of many modern security and smart home systems. Unlike high-voltage electrical wiring, it carries less risk of electric shock and often requires less stringent permitting. However, that doesn't mean it's free from safety considerations. Familiarize yourself with the specific voltage requirements of your chosen security components and the appropriate wire gauges. For security wiring, you might encounter categories like CAT5e or CAT6 for network connectivity and specific gauges for power.
2. Plan Your System Layout
Before you even think about running a single wire, map out your entire security system. Consider: Camera Placement: Where will cameras provide the best coverage? Think about blind spots, entry points, and areas you want to monitor most closely. Sensor Locations: Doors, windows, and high-traffic areas are prime candidates for sensors. Control Panel Location: The central hub of your system should be in a secure, easily accessible location. Wiring Paths: Determine the most efficient and discreet routes for your cables. Consider attic spaces, crawl spaces, and existing conduit.
A well-thought-out plan will save you time, money, and frustration in the long run.
3. Choose the Right Cables and Connectors
Not all cables are created equal. Using the wrong type of cable can lead to signal degradation, system malfunctions, and even safety hazards. For security systems, common cable types include: CAT5e/CAT6: Used for IP cameras and network-based devices, these cables transmit data. Coaxial Cable: Older systems might use coaxial cable for video transmission. Low-Voltage Power Cable:Used to power cameras, sensors, and other components.
Similarly, selecting the correct connectors is vital. Ensure they are compatible with your cables and provide a secure, reliable connection. Crimping tools are essential for proper connector installation.
4. Safety First: Disconnect Power!
Even though it's low voltage, always disconnect the power supply before working on any wiring. This simple step prevents accidental shorts and potential damage to your equipment. Use a voltage tester to confirm that the power is off before proceeding.
5. Comply with Local Codes and Regulations
While low-voltage wiring often has fewer restrictions than high-voltage, it's still crucial to check local building codes and regulations. Some municipalities may require permits for certain installations, especially for outdoor wiring or security systems connected to alarm monitoring services.
6. Invest in Quality Tools
Trying to install a security system with inadequate tools is a recipe for disaster. Invest in a good quality wire stripper, crimping tool, voltage tester, fish tape, and drill. These tools will make the job easier, safer, and more professional. A cable management kit will also help keep your wiring organized and tidy.
7. Proper Cable Management Techniques
Neat and organized cabling is essential for both aesthetics and functionality. Use cable ties, straps, or conduits to keep your wires bundled and secured. Avoid sharp bends or kinks in the cables, as this can damage the wires and impair signal quality. Labeling your cables with a cable labeling machine is also a great way to simplify troubleshooting and future maintenance.
8. Test Your Wiring Before Installation
Before connecting your security components, test your wiring to ensure continuity and proper voltage. A simple multimeter can be used to check for shorts, opens, and voltage drops. This step can save you hours of troubleshooting later on.
9. Understand Voltage Drop
Voltage drop occurs when the voltage at the end of a long cable run is lower than the voltage at the source. This can cause your security devices to malfunction or not function at all. To minimize voltage drop, use thicker gauge wires for longer runs and avoid exceeding the maximum recommended cable length for your devices. Online voltage drop calculators can help you determine the appropriate wire gauge for your specific application.
10. Consider Wireless Options
While wired systems offer greater reliability, wireless components can be a convenient alternative for areas where running wires is difficult or impossible. Modern wireless security systems use encrypted communication protocols to prevent hacking and interference. However, keep in mind that wireless devices require batteries or power adapters and may be more susceptible to interference from other electronic devices.
11. Protecting Outdoor Wiring
If your security system includes outdoor cameras or sensors, protecting the wiring from the elements is crucial. Use weatherproof enclosures, conduits, and connectors to prevent water damage, corrosion, and UV degradation. Burying underground cables requires special direct-burial rated cables and adherence to local codes regarding burial depth.
12. Integrating with Smart Home Systems
Many modern security systems can be integrated with other smart home devices, such as smart lights, thermostats, and door locks. This allows you to create custom automation routines and control your entire home security system from a single app. Ensure that your chosen security system is compatible with your existing smart home platform and that you understand the integration process.
13. Securing Your Network
If your security system uses IP cameras or network-based devices, securing your network is paramount. Change the default passwords on all devices, enable network encryption (WPA2 or WPA3), and consider using a separate VLAN for your security devices to isolate them from your main network. Regularly update the firmware on your security devices to patch security vulnerabilities.
14. Troubleshooting Common Issues
Even with careful planning and installation, you may encounter issues with your security system. Common problems include: Camera Not Working: Check the power supply, cable connections, and network settings. Sensor Not Triggering: Verify the sensor placement, battery level, and wiring connections. False Alarms:Adjust sensor sensitivity, check for obstructions, and review your system settings.
Having a basic understanding of wiring troubleshooting techniques will help you diagnose and resolve problems quickly. A digital multimeter is your best friend when diagnosing most electrical issues.
15. Know When to Call a Professional
While many aspects of security system installation can be DIY, there are times when it's best to call a professional electrician or security system installer. If you're uncomfortable working with electricity, unsure about local codes, or encountering complex wiring issues, don't hesitate to seek professional help. It's always better to be safe than sorry.
People Also Ask:
What's the difference between high-voltage and low-voltage wiring?
High-voltage wiring typically refers to circuits operating at 120 volts or higher and carries a significant risk of electric shock. Low-voltage wiring operates at 50 volts or less and is generally considered safer. Low-voltage wiring is commonly used for security systems, landscape lighting, and other electronic devices.
Can I run low-voltage wiring alongside high-voltage wiring?
In general, it's best to keep low-voltage and high-voltage wiring separate to prevent interference and potential safety hazards. If you must run them parallel, maintain a minimum separation distance of at least 6 inches and use appropriate shielding. Local electrical codes may have specific requirements regarding the separation of low-voltage and high-voltage wiring.
How do I choose the right wire gauge for my security system?
The appropriate wire gauge depends on the voltage, current, and distance of the wiring run. Online voltage drop calculators can help you determine the correct wire gauge to minimize voltage drop and ensure that your devices receive adequate power. In general, thicker gauge wires are required for longer runs and higher current loads.
By following these tips, you'll be well-prepared to tackle your low-voltage security system installation with confidence. Remember to prioritize safety, plan carefully, and don't hesitate to seek professional help when needed. With a little knowledge and effort, you can create a secure and reliable system that protects your home or business for years to come.
Posting Komentar untuk "15 Things to Know Before Installing Low-Voltage Security Systems"