The Homeowner’s Guide to Low-Voltage Cable Categories
The Homeowner’s Guide to Low-Voltage Cable Categories
Ever tripped over a tangled mess of wires behind your entertainment center and wondered, "Is there a better way?" You’re not alone! Understanding the different types of low-voltage cables and how to use them correctly can transform your home entertainment system, improve your internet speeds, and even enhance your home’s security.
Low-voltage wiring is the unsung hero of modern homes. It powers everything from your internet connection and security systems to your landscape lighting and smart home devices. Knowing the different categories of low-voltage cables and their specific applications is crucial for efficient and reliable operation. This guide will equip you with the knowledge to select the right cable for your needs, ensuring optimal performance and safety. It will also give you practical tips on installation and troubleshooting.
Understanding Low-Voltage Cable Categories
Low-voltage cables are designed to carry electrical power at lower voltages than standard household wiring (120V or 240V). This makes them safer to work with and ideal for a variety of applications. Let's break down the most common types: CAT Cables (Category Cables): Primarily used for data transmission. These cables are essential for your home network. Coaxial Cables (Coax): Typically used for connecting cable TV and internet services. Speaker Wire: Designed for connecting speakers to audio receivers or amplifiers. Thermostat Wire: Used to connect thermostats to HVAC systems. Security System Wiring: Powers and connects various components of a security system, such as sensors, cameras, and control panels.
CAT Cables: The Backbone of Your Home Network
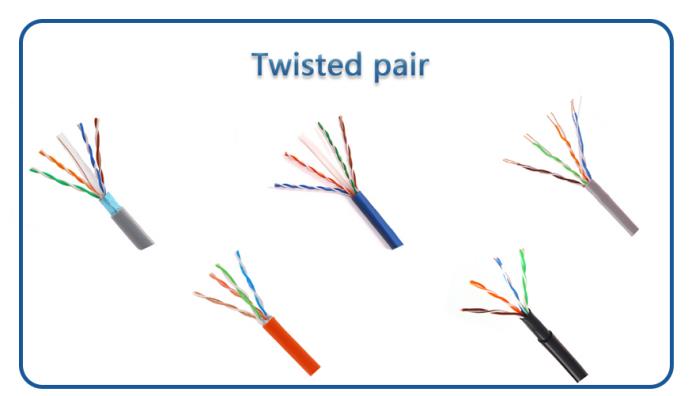
CAT cables are the workhorses of modern data networks. They come in various categories, each offering different levels of performance in terms of bandwidth and speed. Choosing the right CAT cable ensures your network runs smoothly and efficiently.
CAT5: An older standard, generally not recommended for new installations. It supports speeds up to 100 Mbps and is susceptible to interference. CAT5e: An enhanced version of CAT5, offering improved performance and reduced interference. It supports speeds up to 1 Gbps (Gigabit Ethernet) and is a good option for basic home networking needs. CAT6: Offers even better performance than CAT5e, with tighter specifications for crosstalk and system noise. It supports speeds up to 1 Gbps at 100 meters and 10 Gbps at shorter distances. CAT6 is a solid choice for demanding applications like video streaming and online gaming. CAT6a: An augmented version of CAT6, designed for even higher performance. It supports speeds up to 10 Gbps at 100 meters and is ideal for future-proofing your network. CAT7 and CAT8:These are high-end cables designed for demanding environments and professional applications. They offer superior shielding and performance, supporting extremely high speeds over long distances. While overkill for most home users, they might be considered for advanced home theaters or data centers.
Choosing the Right CAT Cable: For most home networks, CAT6 or CAT6a offer the best balance of performance and cost. Consider CAT5e for basic networking needs or if you're on a tight budget.
Coaxial Cables: Connecting to Entertainment
Coaxial cables, often called "coax," are the traditional choice for connecting cable TV and internet services. They feature a central conductor surrounded by insulation and a braided shield, providing excellent signal protection.
RG-6: The current standard for coaxial cables. It offers better shielding and signal quality compared to older RG-59 cables. Use RG-6 for all new installations and upgrades. RG-59: An older type of coaxial cable, generally not recommended for new installations due to its lower bandwidth and shielding capabilities. It might still be found in older homes.
Tip: When installing coaxial cables, use high-quality connectors and compression tools to ensure a secure and reliable connection. Avoid kinking or bending the cable sharply, as this can damage the internal conductor and degrade signal quality.
Speaker Wire: Delivering High-Fidelity Audio
Speaker wire connects your speakers to your audio receiver or amplifier, delivering the audio signal. The quality and gauge of the speaker wire can significantly impact sound quality.
Gauge: Speaker wire gauge refers to the thickness of the wire. Lower gauge numbers indicate thicker wires, which can carry more current with less resistance. For most home audio setups, 16-gauge or 14-gauge speaker wire is sufficient. For long runs or high-power amplifiers, consider using 12-gauge wire. Material: Speaker wire is typically made of copper or copper-clad aluminum (CCA). Copper is the preferred material due to its superior conductivity. CCA is a more affordable option, but it doesn't perform as well as copper.
Pro Tip: To prevent hum and interference, keep speaker wires away from power cables. Use banana plugs or spade connectors to create a secure and clean connection between the speaker wire and the receiver/speakers.
Thermostat Wire: Controlling Your Climate
Thermostat wire connects your thermostat to your HVAC system, allowing you to control the temperature in your home. It typically consists of multiple low-voltage wires bundled together.
Common Types: Common thermostat wire types include 18/2, 18/5, and 18/8, where the first number represents the gauge (18) and the second number represents the number of wires within the cable. Color Coding: Thermostat wires are color-coded to simplify installation and troubleshooting. Common colors include red (power), white (heat), yellow (cool), green (fan), and blue (common).
Important Safety Note: Always turn off the power to your HVAC system before working with thermostat wiring. Incorrect wiring can damage your HVAC system or create a fire hazard. Consult with a qualified HVAC technician if you're unsure about any aspect of the installation.
Security System Wiring: Protecting Your Home
Security system wiring connects various components of your security system, such as sensors, cameras, and control panels. The type of wiring required depends on the specific components and the system's configuration.
Wired vs. Wireless: Modern security systems often incorporate both wired and wireless components. Wired systems offer greater reliability and security, while wireless systems are easier to install. Common Wiring Types: Common wiring types used in security systems include 22/4 or 22/2 gauge wire for sensors and 18/2 gauge wire for power connections. For security cameras, CAT5e or CAT6 cables are often used for transmitting video and power (using Power over Ethernet, or Po E).
Security Tip: When installing security system wiring, conceal the wires as much as possible to prevent tampering. Use tamper-resistant enclosures for control panels and other critical components. Consider using a professional security system installer for optimal security and reliability.
Installation Tips and Best Practices
Working with low-voltage wiring is generally safer than working with standard household wiring, but it's still essential to follow safety precautions and best practices.
1.Turn Off the Power: Always turn off the power to the circuit or device you're working on before starting any wiring project.
2.Use the Right Tools: Invest in quality tools designed for low-voltage wiring, such as wire strippers, crimpers, and cable testers.
3.Label Your Wires: Label your wires clearly to avoid confusion during installation and troubleshooting. Use a label maker or write directly on the wire with a permanent marker.
4.Follow Wiring Diagrams: Always follow the wiring diagrams provided with your devices. Incorrect wiring can damage your equipment or create a safety hazard.
5.Test Your Connections: Use a cable tester to verify that your connections are correct and that the cable is functioning properly.
6.Cable Management: Keep your wiring neat and organized by using cable ties, zip ties, or cable trays. Proper cable management improves airflow and makes it easier to troubleshoot problems in the future.
7.Avoid Sharp Bends: Avoid bending cables sharply, as this can damage the internal conductors and degrade signal quality. Use gentle curves and avoid kinking the cables.
8.Protect Your Cables: Protect your cables from physical damage by running them through conduits or cable sleeves. This is especially important in outdoor or exposed environments.
9.Consider Future Needs: When running cables, consider your future needs and run extra cables if possible. This will save you time and effort in the long run if you need to add new devices or expand your network.
10.When in Doubt, Call a Professional: If you're unsure about any aspect of low-voltage wiring, don't hesitate to consult with a qualified electrician or technician. It's always better to be safe than sorry.
Troubleshooting Common Issues
Even with careful installation, problems can sometimes arise with low-voltage wiring. Here are some common issues and how to troubleshoot them: Slow Internet Speed: Check your CAT cables to ensure they're properly connected and that you're using the correct category of cable for your network. Try replacing the cable with a new one to rule out a faulty cable. Poor Audio Quality: Check your speaker wires to ensure they're properly connected and that the gauge is appropriate for your speakers and amplifier. Try replacing the speaker wire with a new one. Non-Functional Thermostat: Check your thermostat wiring to ensure it's properly connected and that the wires are securely attached to the terminals. Replace the batteries in your thermostat. Security System Malfunctions: Check the wiring connections to your sensors and control panel. Ensure that the power supply is working correctly. Interference:If you're experiencing interference with your audio or video signals, try moving your cables away from power cables and other sources of interference. Use shielded cables for added protection.
People Also Ask
Can I run low-voltage and high-voltage wires together?
No, it is generally not recommended to run low-voltage and high-voltage wires together in the same conduit or bundle. This can cause interference and potentially create a safety hazard. Keep them separate whenever possible.
What's the difference between shielded and unshielded CAT cables?
Shielded CAT cables have an extra layer of shielding to protect the signal from interference. They're recommended for environments with high levels of electromagnetic interference. Unshielded cables are more common and suitable for most home environments.
How do I terminate CAT cables?
Terminating CAT cables involves stripping the outer jacket, untwisting the wires, and inserting them into a RJ45 connector according to a specific wiring standard (T568A or T568B). You'll need a crimping tool to secure the connector to the cable. There are many helpful videos available online.
Wrapping Up
Understanding the different categories of low-voltage cables and how to use them correctly can significantly improve the performance, reliability, and safety of your home's electrical systems. By following the tips and best practices outlined in this guide, you can confidently tackle your next low-voltage wiring project and enjoy the benefits of a well-connected and protected home. Remember to always prioritize safety and consult with a professional when needed. You've got this!
Posting Komentar untuk "The Homeowner’s Guide to Low-Voltage Cable Categories"