Troubleshooting Common Low-Voltage Security Wiring Issues
Troubleshooting Common Low-Voltage Security Wiring Issues
Ever find your security cameras showing a blank screen, or your smart lights refusing to dim? Chances are, the problem lies within the intricate network of low-voltage wiring that powers these modern conveniences. Don't panic! Many of these issues are surprisingly easy to diagnose and fix with a little know-how.
Low-voltage wiring is the unsung hero of our smart homes and security systems. Unlike the high-voltage lines that power our appliances, low-voltage systems carry a smaller electrical current, typically 50 volts or less. This type of wiring is commonly used for doorbells, thermostats, security cameras, landscape lighting, home theaters, and other smart home systems. Understanding the basics of how this wiring works, and how to maintain it, can save you time, money, and a lot of frustration. This guide will walk you through common problems, their solutions, and essential safety precautions.
Identifying and Addressing Common Wiring Problems
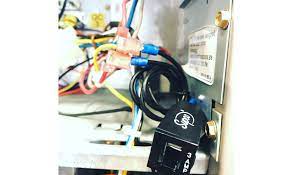
The first step in resolving any low-voltage issue is to identify the source of the problem. Here are some typical culprits and how to tackle them: Loose Connections:This is perhaps the most frequent offender. Vibration, temperature changes, and even simple age can cause connections to loosen over time.
Solution: Carefully inspect all connections, from the power source to the device itself. Use a screwdriver to tighten screws on terminal blocks and connectors. If a wire is frayed or damaged at the connection point, trim it back and re-strip it before re-connecting. Always turn off the power before working on any electrical connection.
Damaged Wiring: Nicks, cuts, or even kinks in the wire can disrupt the flow of electricity. This is particularly common in outdoor installations where the wiring is exposed to the elements or potential animal damage.
Solution: Visually inspect the entire length of the wiring for any signs of damage. If you find a damaged section, replace it entirely. For minor damage, youmightbe able to use electrical tape as a temporary fix, but replacing the damaged section is always the best long-term solution. Ensure the replacement wire is the correct gauge and type for the application.
Incorrect Wiring: A common issue, especially after DIY projects. Incorrect wiring can lead to system malfunction or even damage to your devices.
Solution: Double-check your wiring diagrams! Refer to the manufacturer's instructions for your security system, smart lighting, or other devices. If you’re unsure, consult a qualified electrician. Mismatched wire colors or incorrect polarity can cause all sorts of problems.
Power Supply Issues: The power supply itself might be failing to deliver the correct voltage or amperage.
Solution: Use a multimeter to test the output voltage of the power supply. Compare the reading to the manufacturer's specifications. If the voltage is significantly lower than it should be, the power supply likely needs to be replaced. Also, check the power supply's amperage rating to ensure it's sufficient for all the devices it's powering. Overloading a power supply can cause it to fail.
Water Damage: Moisture can corrode connections and damage wiring, leading to shorts or open circuits. This is especially prevalent in landscape lighting or outdoor security camera installations.
Solution: Inspect all outdoor connections for signs of corrosion. Clean corroded terminals with a wire brush and apply dielectric grease to protect them from future moisture. Ensure that all outdoor wiring is properly protected with weatherproof connectors and conduit. If the wiring is severely damaged by water, replace it.
Step-by-Step: Tracing a Faulty Low-Voltage Circuit
When you're facing a complete system failure, tracing the circuit is essential. Here's how:
1.Disconnect the Power:Alwaysturn off the power to the circuit before you begin. Safety first!
2.Start at the Power Source: Begin your inspection at the power supply or transformer. Use a multimeter to verify that it's providing the correct voltage.
3.Check Connections: Systematically check each connection along the circuit, looking for loose wires, corrosion, or damage. Tighten any loose screws and clean corroded terminals.
4.Isolate the Problem Area: If you have multiple devices on the circuit, disconnect them one by one to see if the problem disappears. This will help you pinpoint the specific device or section of wiring that's causing the issue.
5.Test the Wiring: Use a multimeter to test the continuity of the wiring. Disconnect the wire at both ends and then use the multimeter to check if the circuit is complete. If there's no continuity, there's a break in the wire.
6.Replace Damaged Components: Once you've identified the faulty component or section of wiring, replace it with a new one. Make sure to use the correct type and gauge of wire.
7.Reconnect and Test: After replacing the damaged components, reconnect everything and turn the power back on. Test the system to ensure that it's working properly.
Tips for Maintaining Your Structured Cabling
Preventative maintenance is key to avoiding future problems. Here are some tips to keep your low-voltage wiring in top shape: Regular Inspections: Schedule regular inspections of your wiring, especially in outdoor areas. Look for signs of damage, corrosion, or loose connections. Proper Cable Management: Keep your wiring organized and protected. Use cable ties, conduit, and other cable management solutions to prevent wires from becoming tangled or damaged. Weather Protection: Protect outdoor wiring from the elements. Use weatherproof connectors, conduit, and enclosures to prevent water damage and corrosion. Avoid Overloading Circuits: Don't overload your power supplies. Make sure that the amperage rating of the power supply is sufficient for all the devices it's powering. Use Quality Components: Invest in high-quality wiring, connectors, and power supplies. Cheap components are more likely to fail and cause problems. Label Your Wires: Labeling your wires makes it much easier to troubleshoot problems in the future. Use a labeling machine or write clearly on cable ties. Professional Installation:If you're not comfortable working with electrical wiring, hire a qualified electrician to install your security system, smart lighting, or other low-voltage devices.
Safety First: Essential Precautions
Working with electrical wiring, even low-voltage, requires caution. Here are some essential safety precautions: Always Disconnect Power: Before working on any wiring, always disconnect the power to the circuit. Use a circuit tester to verify that the power is off. Use Insulated Tools: Use tools with insulated handles to protect yourself from electrical shock. Wear Safety Glasses: Wear safety glasses to protect your eyes from debris. Don't Work in Wet Conditions: Avoid working on electrical wiring in wet conditions. Know Your Limits: If you're not comfortable working with electrical wiring, hire a qualified electrician. Check Local Codes: Ensure your work complies with local electrical codes.
Frequently Asked Questions (FAQs)
What type of wire should I use for my security cameras?
For most security camera installations, you'll want to use either Cat5e or Cat6 cable. These cables are designed for network wiring and can transmit both data and power (Po E - Power over Ethernet) if your cameras support it. Choose shielded cable (STP) for outdoor runs to minimize interference.
Can I run low-voltage wiring next to high-voltage wiring?
It's generally not recommended to run low-voltage wiring parallel to high-voltage wiring for extended distances. The high-voltage wiring can induce interference in the low-voltage wiring, potentially disrupting the signal. If you must run them close together, try to maintain a separation of at least 12 inches and use shielded low-voltage cables. Crossing the wires perpendicularly is acceptable.
How do I test for a short circuit in low-voltage wiring?
Disconnect the power and use a multimeter set to the continuity setting. Place one probe on one conductor and the other probe on the other conductor. If the multimeter shows continuity (a reading close to zero ohms), there is a short circuit.
What are common causes of landscape lighting failure?
Common causes include water damage, corrosion, damaged wiring from lawn equipment, and burned-out bulbs. Regular inspection and maintenance are key to preventing these issues. Make sure your landscape lighting is properly grounded and protected from the elements.
Wrapping Up
Taking the time to understand and address the common issues with low-voltage wiring, whether it's for your security system wiring, smart home system, or landscape lighting, can save you significant headaches. By following these troubleshooting steps and maintenance tips, you can keep your systems running smoothly and safely. And remember, when in doubt, always consult a qualified electrician. With a little proactive care and a dash of DIY spirit, you can master the art of maintaining your low-voltage world.
Posting Komentar untuk "Troubleshooting Common Low-Voltage Security Wiring Issues"